How to restore the double-click to convert for .zoom files on Windows
Preface
The Zoom installer doesn’t link the .zoom files to the converter app anymore. Last week I wrote posts about how to convert the files manually. While that works fine, it’s not convenient to always use the command line for the conversion.
This guide explains how to restore the ability to convert .zoom files by just double-clicking them on Windows. Here you can find the guides for Linux and macOS.
I’m assuming that you’ve installed the Zoom client using the standard way.
Step 1
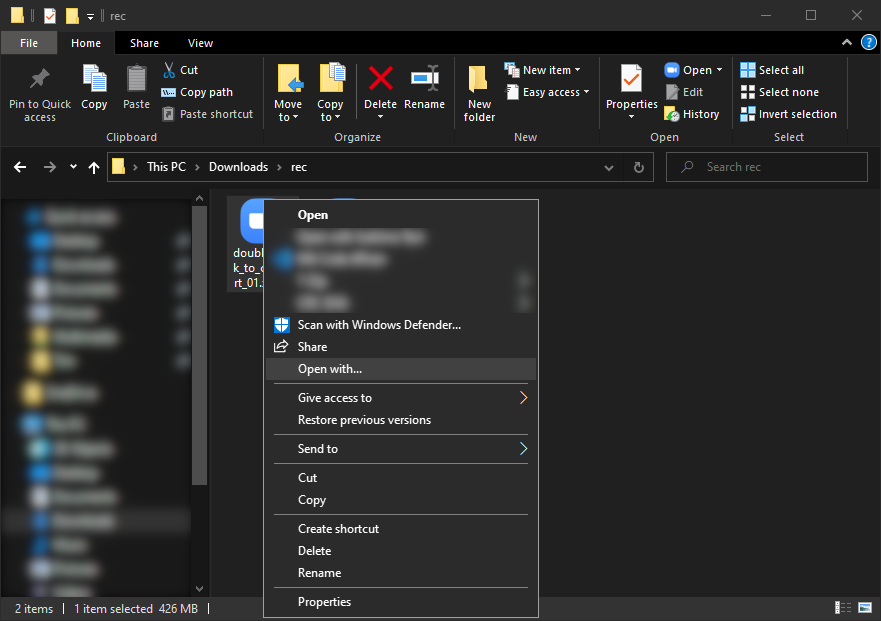
Open the folder with your .zoom files in the Explorer and right-click the first one. Click on the ‘Open with…’ entry.
Step 2
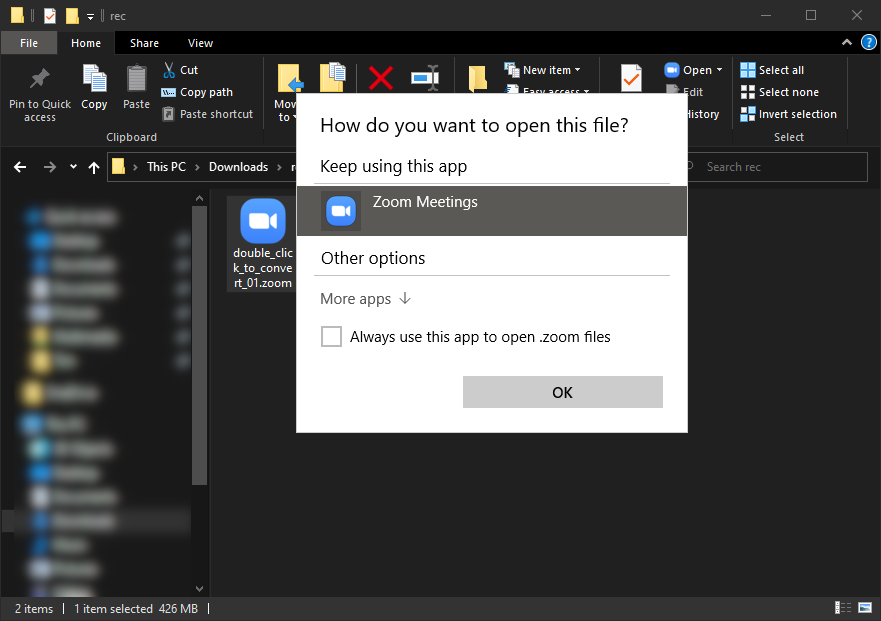
In the “How do you want to open this file?” window click on “More apps” to expand the list of all apps.
Step 3

You should check the “Always use this app to open .zoom file” checkbox to make this permanent. Scroll the list all the way down and click on the “Look for another app on this PC”.
Step 4
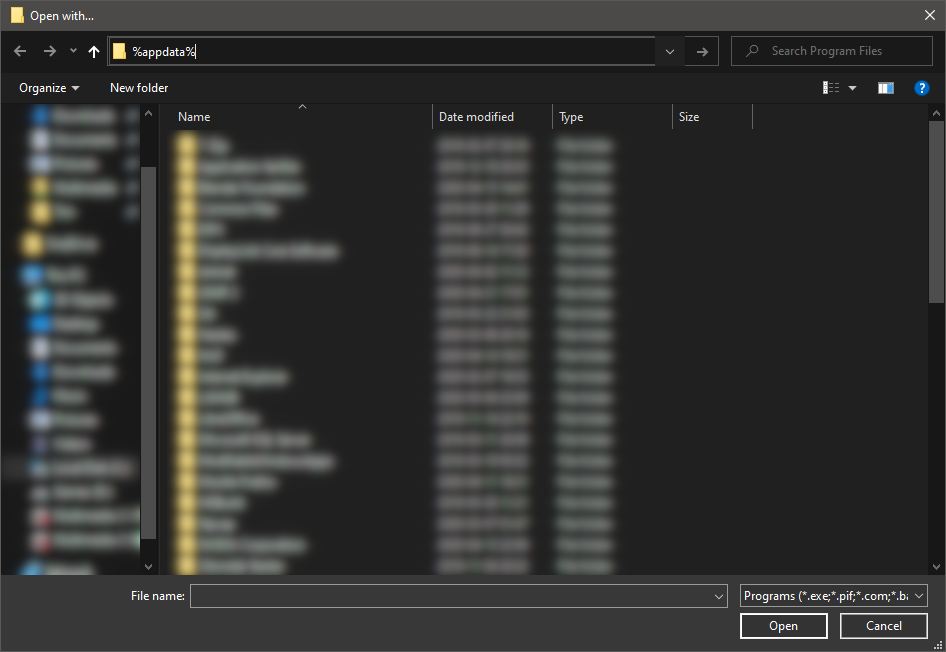
Click on the path input box and type in %appdata%, confirm with Enter. This will take you to the AppData\Roaming folder.
Step 5
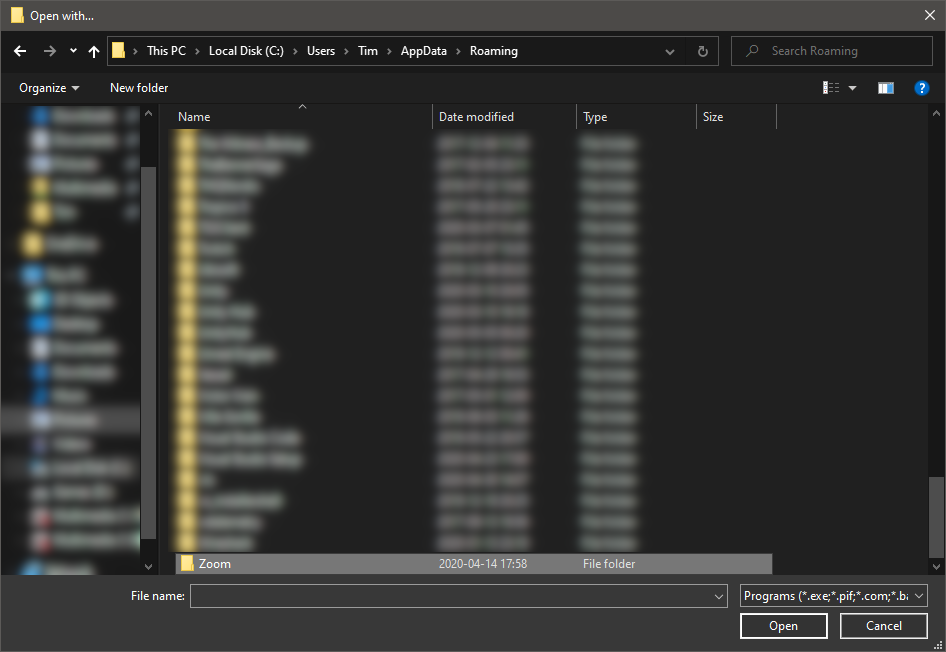
Find the “Zoom” folder in the list and double-click it.
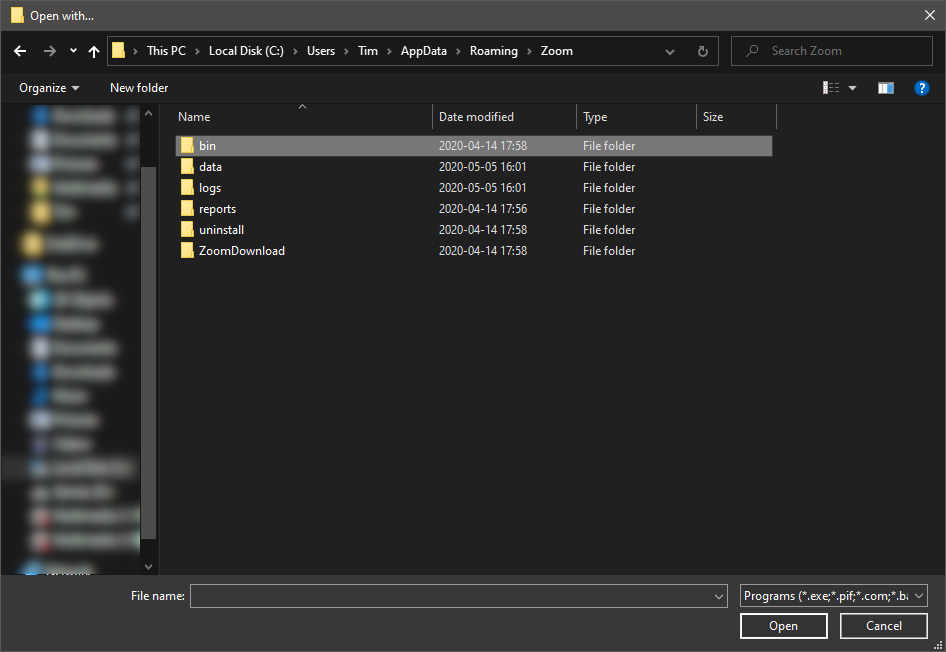
Now double-click the “bin” folder.
Step 6
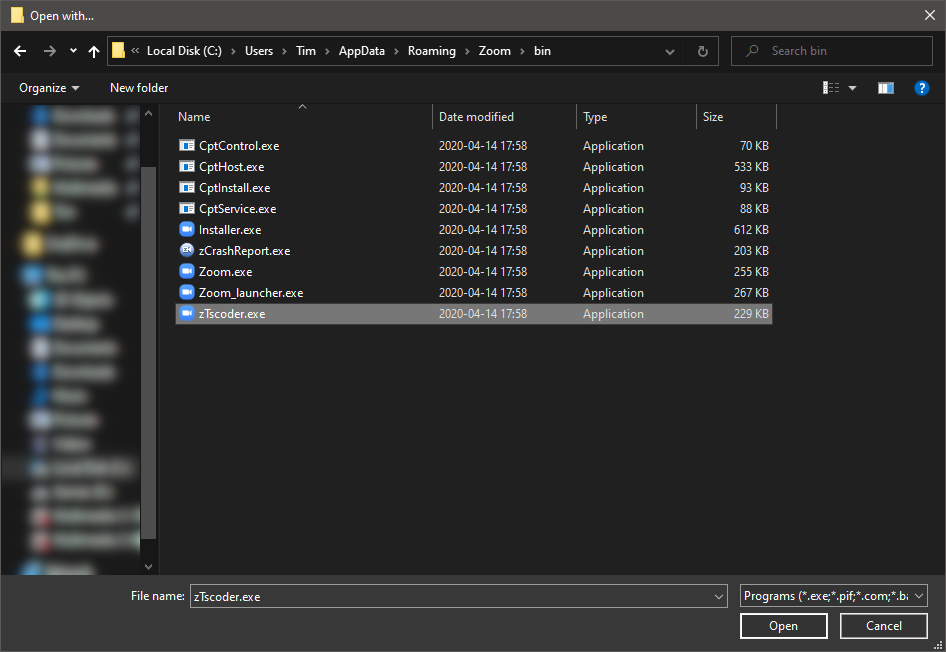
Double-click the file “zTcoder.exe” to associate the .zoom files with it and start the conversion.
Step 7
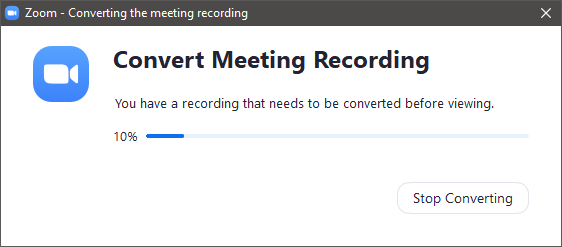
Zoom will now convert the file(s) and close the window. You can find the converted files in the same folder that your .zoom files were in.
Step 8
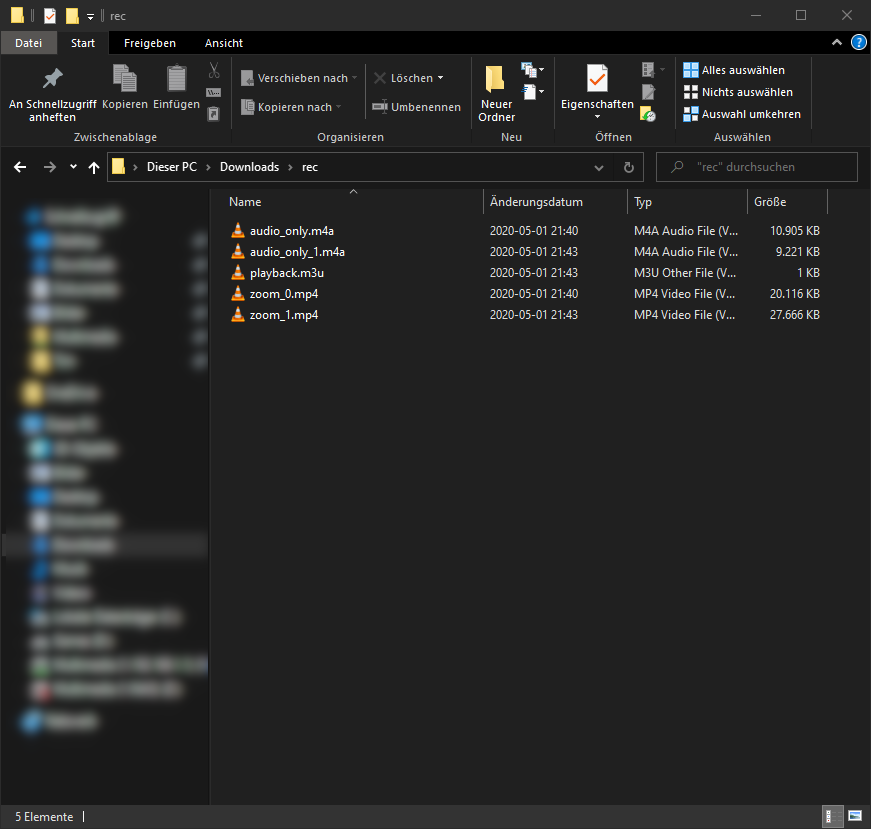
Once the conversion is complete, you can find the converted files in the same folder the original .zoom files were in. If you want to convert the recordings in the future you just need to double-click the files.